
7.1 Multiple Sheet Basics
Learning Objectives
- Navigating through a multiple sheet file.
- Adding, deleting, copying, and moving sheets.
- Grouping and ungrouping sheets.
- Creating 3-D references across sheets.
- Creating a template.
Throughout our textbook, we have worked with Excel files that have included multiple sheets. Depending on the version of Excel you are using, a new Excel file starts with several sheets. In this chapter, we will be working with a personal budget file that contains income and expenses for an entire year. Our file contains a sheet for each month of the year, as well as, a Summary sheet that will add all twelve monthly sheets of data together. To begin with, we’ll get comfortable with moving through the sheets, organizing them, and making sure that all twelve monthly sheets are consistent.
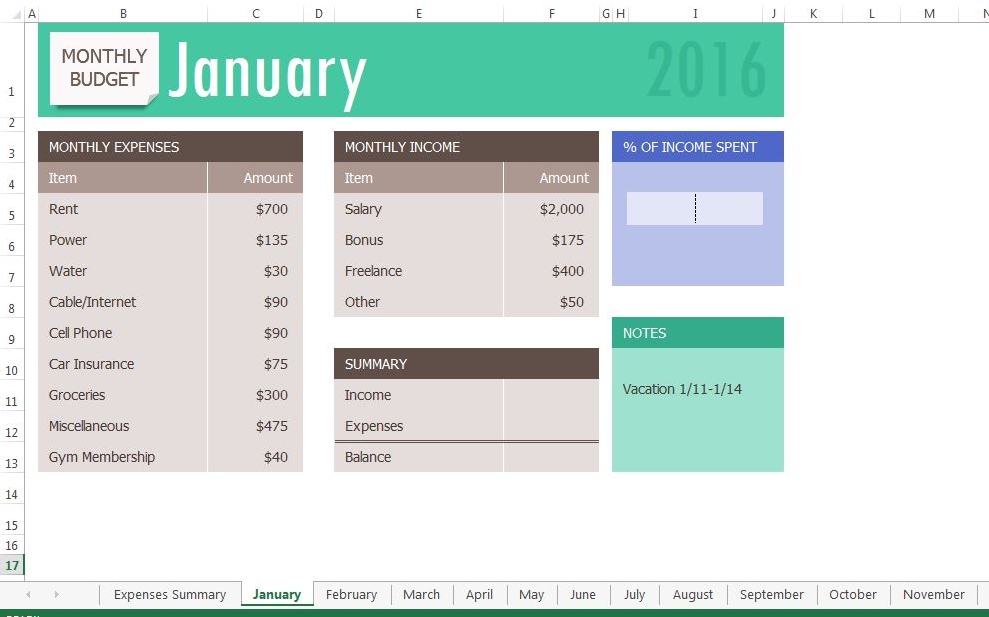
Figure 7.1 shows the January sheet in the Personal Budget file along with all the sheet tabs along the bottom of the window.
Navigating Through a Multiple Sheet File
Download Data file: CH7-Data
1. Open the data file CH7 Data and save the file to your computer as CH7 Personal Budget. Notice that the file has a Expenses Summary sheet at the far left followed by monthly sheets.
2. Click on the different sheets at the bottom of the screen to move through the sheets. Notice that the Expenses Summary sheet is formatted differently from the monthly sheets. Notice also that all the monthly sheets are identical in layout and format.
3. Take a second look at the months at the end of the year. Not all the data has been entered for September through October… and there is no sheet for December. We will enter the remaining data and add an additional sheet for December.
4. Add the following data in the September, October, and November sheets:
| September | October | November | |
| Power | $135 | $135 | $135 |
| Water | $30 | $30 | $30 |
| Groceries | $300 | $325 | $400 |
| Miscellaneous | $100 | $50 | $100 |
| Bonus | |||
| Freelance | $500 | $150 | |
| Other | $100 |
Copying a Sheet
- To make a December sheet, we are going to copy the November sheet.
- Point your mouse at the November sheet tab at the bottom of the screen.
- Hold down your left mouse button and then press and hold down the CTRL key.
- At this point, you will see a black down-pointing arrow to the left of the November sheet tab and your mouse cursor will become a small piece of paper with a plus sign on it.
- Drag your mouse to the right (still holding down the left-mouse button and the CTRL key) until the black down-pointing arrow is to the right of the November sheet tab.
- Let go of the mouse button and then the CTRL key. You should now have a November (2) sheet to the right of the November sheet as shown in Figure 7.2.
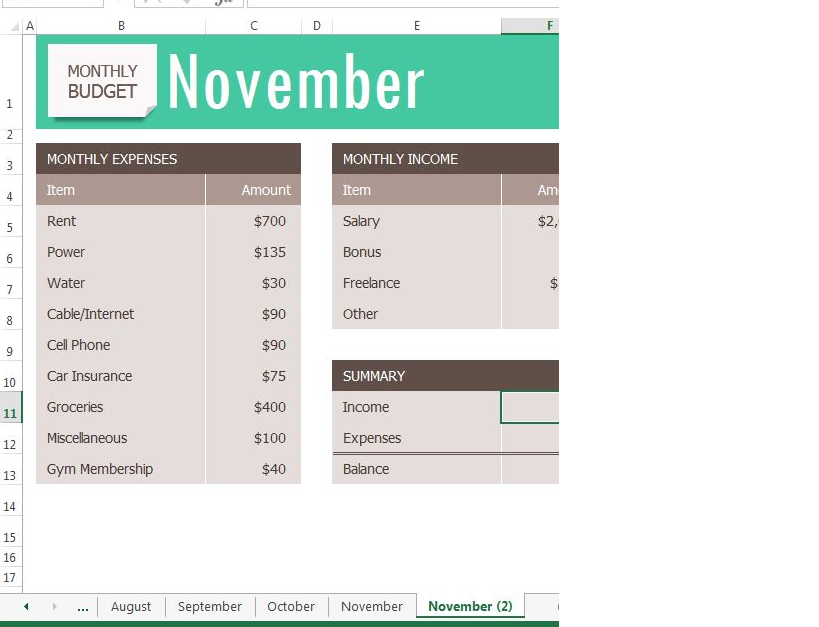
Next, we’ll update the November (2) sheet to turn it into our December sheet.
- Right-click on the November (2) sheet name at the bottom of the screen and choose Rename.
- Type “December” and press Enter.
- Click on the December sheet.
- Click on B1 and change “November” to “December”.
- Make the following data changes:
- Miscellaneous: $300
- Bonus: $250 (it’s the holidays!)
- Freelance: delete amount
- Save your work.
- Point your mouse at the December sheet tab at the bottom of the screen.
- Hold down your left mouse button and then press and hold down the CTRL key.
- Drag your mouse to the right (still holding down the left-mouse button and the CTRL key) until the black down-pointing arrow is to the right of the December sheet.
- Let go of the mouse button and then the CTRL key. You should now have a December (2) sheet to the right of the December sheet.
- Rename the December(2) sheet Practice.
Skill Refresher
Copying a Sheet
- Point your mouse at the sheet you want to copy at the bottom of the screen.
- Hold down your left mouse button and then press and hold down the CTRL key.
- Drag your mouse to the right (still holding down the left-mouse button and the CTRL key) until the black down-pointing arrow is to the right of your existing sheet.
- Let go of the mouse button and then the CTRL key. You should now have a Sheetname (2) to the right of the original sheet.
- Rename the Sheetname (2) sheet as desired.
Moving and Deleting Sheets
Sometimes your sheets do not end up in the right order, and you need to move them in order to fix this. Let’s try moving our “Practice” sheet to see how this is done.
- Point to the Practice sheet and hold down your left mouse button.
- Notice this time that there is still a black arrow to the left of the Practice sheet, but the piece of paper is blank. It does not have a plus sign (+) because we are moving, instead of copying, the sheet.
- Left-drag the mouse to the right until the black arrow marker is between the October and November sheets.
- Release the mouse button.
- Try moving the Practice sheet back to the right of the December sheet.
Since our Practice sheet is not a sheet we will need in our Budget file, we’ll go ahead and delete it now.
- Right-click on the Practice sheet tab at the bottom of the screen.
- Click Delete. Figure 7.3 shows the warning message box that will appear on your screen. Your message box might look slightly different depending on the version of Excel you are using. It is important to note that you cannot Undo once you delete a sheet!

Figure 7.3 Warning Message Box - Click Delete.
Grouping and Ungrouping Sheets
Take a look at our monthly sheets again. Notice that there is a place in each of these sheets to calculate three pieces of Summary data: Income, Expenses, and Balance; but there aren’t any formulas in these cells. There is also a place for the % of Income Spent, but we need a formula in I6:I7 to calculate this. If we entered these formulas individually in each of the 12 month sheets, it would take a long time! Because this task would be very repetitive, it would also be fairly likely that we would make some mistakes along the way entering the same formulas over and over again. By grouping all the month sheets together, we can enter each of the formulas once and have them appear in all the sheets.
- Click on the January sheet to make it active.
- Hold the SHIFT key down and click on the December sheet.
Now all 12 sheets should be selected. You can tell this in two ways: the sheet tabs that have been selected are now bold at the bottom of your screen. Notice in the Title bar at the top of the screen the word [Group] added to the end of the title. You can see both of these in Figure 7.4.
![Group of 12 months is circled in black and text is bold indicating they are grouped. [Group] is added to CH6 Personal Budget file name at top right.](https://uhlibraries.pressbooks.pub/app/uploads/sites/5/2019/03/image4-3.png)
IT IS IMPORTANT TO REMEMBER THAT ANY CHANGES WE MAKE TO THE JANUARY SHEET WILL BE MADE TO ALL THE SHEETS!! This is a very good thing when we want to make changes to all the sheets at once, but we need to be sure to ungroup them when we’re done making these changes.Let’s go ahead and add the formulas to all twelve of the sheets at once:
- Click in F11 in the January grouped sheet.
- Enter the formula =SUM(F5:F8).
- In F12, enter the formula =SUM(C5:C13).
- In F13, subtract Expenses from Income. In the January sheet, your balance should be $690. HINT: if your answer is negative, you subtracted Income from Expenses.
- Click on I6. (I6 and I7 are formatted and merged together – this is fine.)
- Enter a formula that divides Expenses (F12) by Income (F11). Your answer will show as a percentage since this cell has already been formatted to do this. HINT: If you percentage is greater than 100%, you have your numbers reversed.
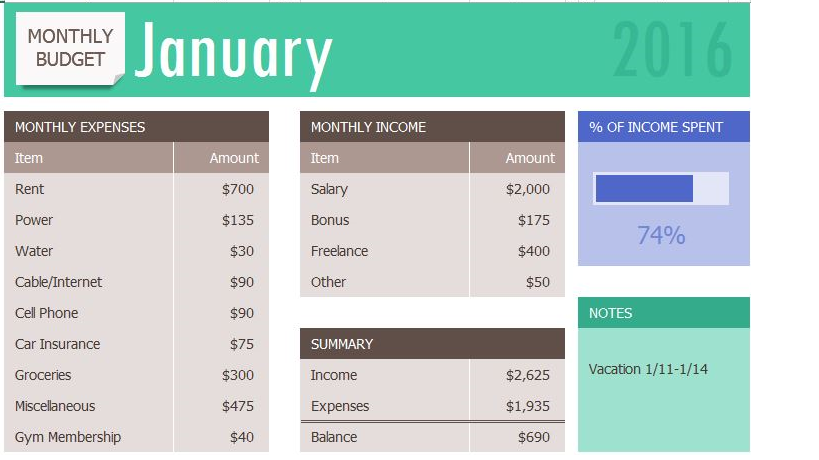
Notice that a data bar was set up in I5 to visually show the income spent. Do you remember how to do this from earlier in our textbook? Your January sheet should now look like Figure 7.5.
7. Now that we are done making changes to all the monthly sheets at once, we need to ungroup them. Right-click on one of the grouped sheets and choose Ungroup Sheets.
Notice the sheets tabs are no longer bold and the word [Group] is no longer in the title bar.
8. Click on several of the month sheets to see that all the formulas have been added.
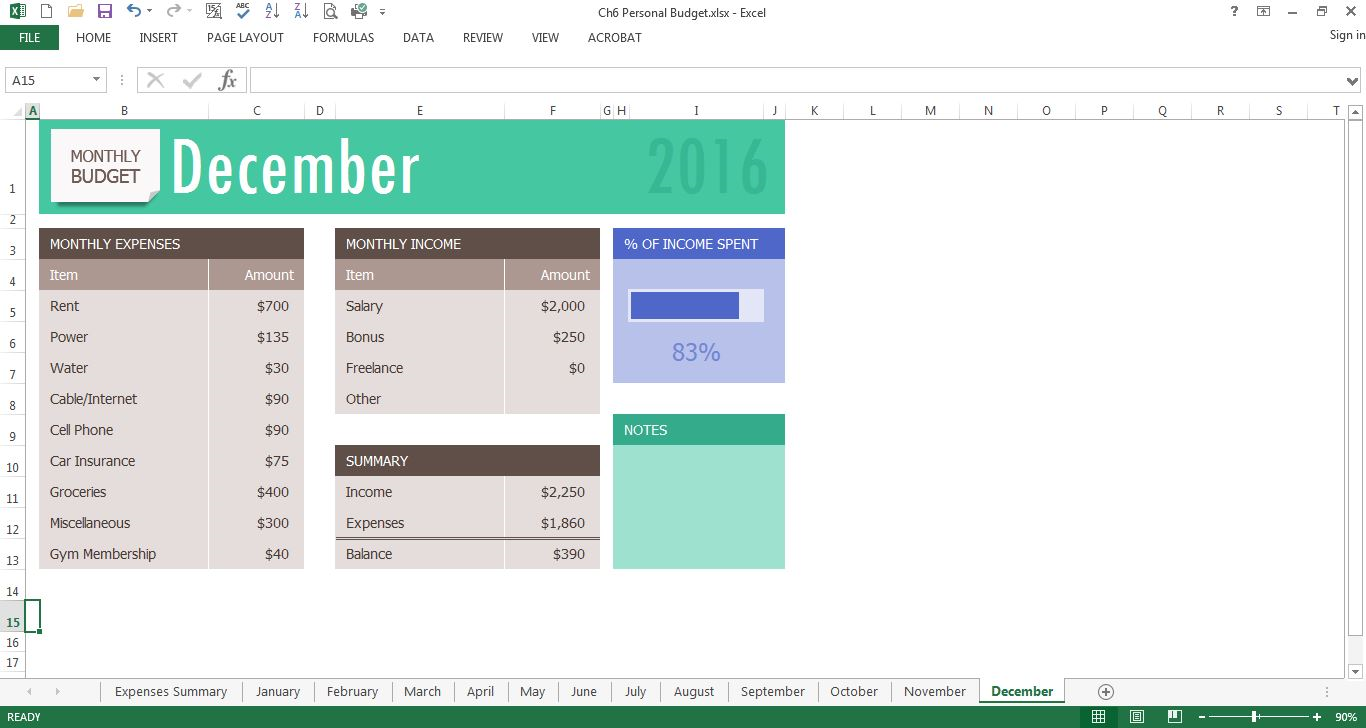
9. Click on the December sheet. Your sheet should now look like Figure 7.6.
- Take a look at the Notes in the September sheet. It says that the rent was raised in September, so we need to cancel our Gym Membership and show $0 for the Gym amount in October, November, and December.
- Group the October, November, and December sheets. If you do this successfully, these three sheet names should be bold and the word [Group] will appear in the Title bar.
- Click on C13 and change the amount to $0. Press Enter.
- Ungroup the sheets.The balances should be: October $605, November $530, and December $430.
Skill Refresher
To Group Sheets:
Click on the leftmost sheet you want to group; then hold the SHIFT key down and click on the rightmost sheet you want to group.
To Ungroup Sheets:
Right-click on one of the grouped sheets and choose Ungroup Sheets.
Key Takeaways
- You can easily move, copy, delete, and rename sheets in your Excel file.
- Grouping sheets allows you to change a group of identically formatted sheets at the same time.
Attribution
“7.1 Multiple Sheet Basics” by Diane Shingledecker, Portland Community College is licensed under CC BY 4.0
